
How to Decorate a High Ceiling Wall: Impactful Ideas
Key Takeaways
- Big walls need big moves: oversized art, tall gallery grids, and layered textures to match the scale;
- Anchor decor to furniture lines, then build upward so the room feels connected and balanced;
- Use paint, trim, mirrors, textiles, lighting, and drapery to break up height and add dimension;
- Mixtiles peel-and-stick frames are renter friendly, so you can design, test, and rearrange without holes.
High ceilings are stunning, but their vast walls can feel intimidating. The secret is scale, anchoring, and smart layering. In this guide, you will learn how to decorate a high ceiling wall with tall gallery grids, mirrors, textiles, lighting, paint, and trim. We will share simple layout rules and sizing tips you can use in a living room, entry, or great room. Whether you rent or own your home, these ideas can make your space feel polished and personal.
Ready to transform your tall wall? Create stunning gallery walls in minutes with Mixtiles. Our adhesive, repositionable frames make building your dream picture wall easy and damage-free. Start designing in the Mixtiles app or on mixtiles.com today.
Why does scale matter when you decorate a high ceiling wall?
Large walls swallow small art. Choose large canvas pictures, one big mirror, or a generous grid so pieces do not “float.” Make sure you anchor the lowest row near furniture, for example a sofa, console, or dining table. This connects art to the interior architecture, balances the ceiling height, and creates a strong focal point that draws the eye upward through the room. For room-by-room proportions and printable charts, bookmark our wall art size guide.
What are the quickest, renter-friendly ways to fill tall walls?
These fast wins work in high ceilings and small rooms alike.
- Build a floor-to-ceiling photo grid with Mixtiles adhesive, repositionable frames, no nails and no tools;
- Layer a statement mirror with lightweight textiles or a tapestry to add texture, warmth, and height.
Not using nails? Here is exactly how to hang wall art without nails for a clean, damage-free setup.
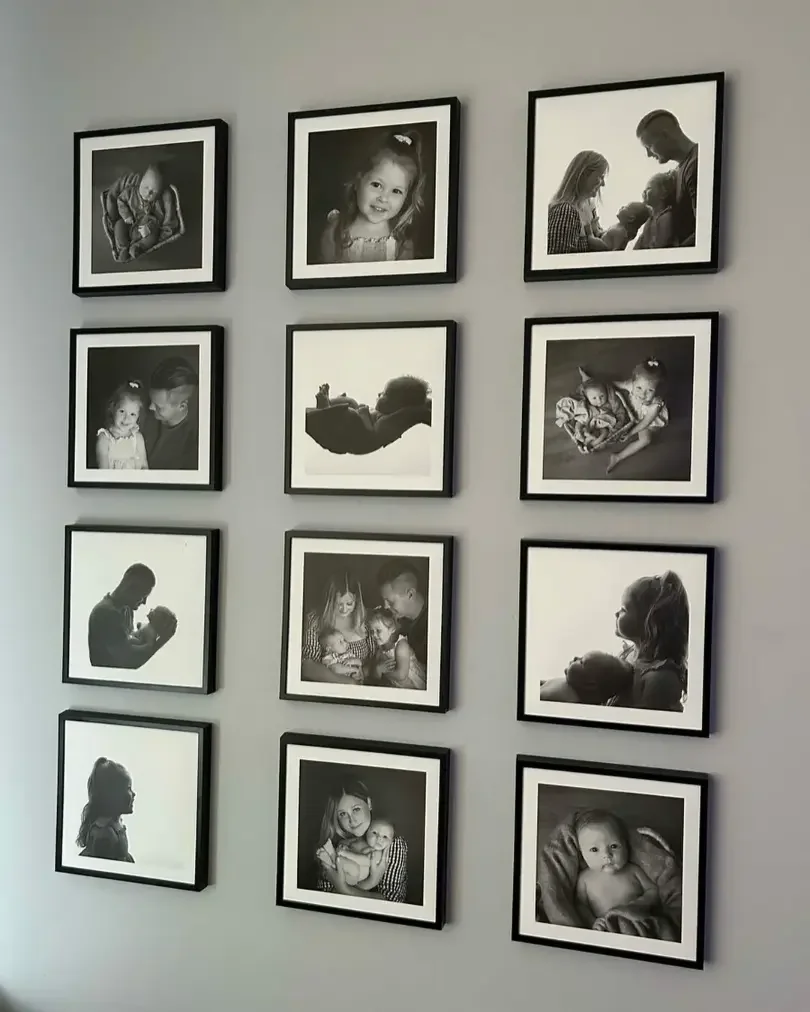
How to decorate a high ceiling wall with gallery grids?
Use consistent tile sizes and tight spacing to create structure. Start low, then add rows until the composition feels proportional to the wall and furniture.

Grid vs. salon-style: which works best?
A grid feels modern and calm, perfect for a living room with clean interior design. Match frame sizes and keep spacing equal so the wall reads as one large piece of art. Salon-style mixes sizes and artwork, which may suit eclectic decor. Unify the mix with one frame color and consistent gaps so the room feel stays cohesive.

Placement and spacing rules that always work
Follow these simple rules to keep your arrangement crisp and proportional.
- Start 6 to 8 inches above a sofa, console, or headboard to anchor the display;
- Keep gaps at 2 to 3 inches between tiles so the grid reads as one composition;
- Fill at least two thirds of the furniture width to create a confident focal point.
Preview your layout before you hang a thing. Upload photos, choose frames, and mock up a grid of our versatile photo tiles in the free Mixtiles app. You can peel, stick, and adjust until your design is perfect.
Which sizes work best for high ceilings?
Choose tile sizes that scale to your wall width and ceiling height. Use this quick table as a starting point for common living room walls.
|
Tile Size |
Metric |
Suggested Grid for 10 ft wide wall |
|---|---|---|
|
20.32 × 20.32 cm |
5 columns × 5 rows, with 2–3 in gaps |
|
|
30.48 × 30.48 cm |
4 columns × 4 rows, anchor above furniture |
|
|
12 × 16 in |
31.6 × 41.75 cm |
3 columns × 4 rows, portrait for extra height |
How can paint, trim, or wallpaper break up a towering wall?
Color and texture can right-size tall interiors. Try two-tone paint or add box molding to create panels that add rhythm. Grasscloth or a bold mural adds depth without clutter. You can also paint the ceiling a shade deeper to visually lower the height while keeping the room bright at floor level.
Can lighting and drapery do the heavy lifting?
Yes. A tiered chandelier or sculptural pendant bridges negative space and turns height into a feature. Full-length drapery hung high and wide softens the wall, improves acoustics, and frames your art. In large rooms, these elements act like architecture and guide sightlines to your focal point.
How high should you hang art on a tall wall?
Keep the center of primary art at 57 to 60 inches where you spend most time standing or seated. Over furniture, leave 6 to 8 inches between the top of the furniture and the bottom row. In double-height spaces, still anchor low, then add rows to draw the eye up while the composition stays connected to the room. Get more placement specifics in our guide on how high to hang art on a wall. If your space has a sloped or cathedral ceiling, explore our vaulted ceiling wall decor ideas for layouts that celebrate the height.
How do you plan your layout before committing?
Reduce guesswork with a quick plan.
- Tape out your grid on the wall, or use kraft-paper templates to test columns;
- Measure once, then use the Mixtiles app preview to confirm spacing and scale;
- Peel, stick, and step back; adjust tiles until the design and proportions feel right.
Learning how to decorate a high ceiling wall comes down to scale, anchoring, and layers. Combine tall gallery grids, mirrors or textiles, strategic paint or trim, and statement lighting to balance height and create a focal point. Mixtiles photo tiles make it easy to design boldly, then rearrange as your home and decor evolve, no holes required.
Make your tall wall the best view in your home. Design a stunning display with our peel-and-stick canvas prints. Get a free preview, fast shipping, and the freedom to rearrange your wall arts whenever inspiration strikes.
Frequently Asked Questions
How do I choose the right scale for art on a high wall?
Aim for pieces or groupings that span 60 to 75 percent of the wall width, or at least two thirds of the furniture width. Start 6 to 8 inches above furniture, keep centers near 57 to 60 inches in primary zones, then build upward to maintain connection.
What are inexpensive ways to fill a tall wall?
Use a large painted color block, DIY canvas or fabric panel, printable posters in matching frames, a floor-to-ceiling photo grid, thrifted mirrors, or floating shelves with plants and books. Keep spacing consistent so the composition reads as one statement.
How can I reduce echo on a high ceiling wall?
Add full-height curtains, large rugs, upholstered seating, and soft wall hangings. Consider acoustic panels wrapped in fabric, a bookcase wall, or a tapestry. Spacing art slightly off the wall and layering materials increases sound absorption without sacrificing style.
How do I safely hang decor on a double-height wall?
Plan from the floor up, mark heights, and use a sturdy ladder or scaffolding with a spotter. Choose lightweight pieces and secure with appropriate anchors. For high placements, design modular groupings you can add from lower levels to minimize risky installs.
Be the first to know — deals, news & decor ideas.
By clicking you agree to the Terms of Use & Privacy Policy