
Small Apartment Wall Decor: Renter-Friendly Tips
Key Takeaways
- Use lightweight, damage-free pieces and smart layouts to maximize small apartment wall decor without risking your deposit;
- Plan with scale: choose right-sized wall art, consistent spacing, and cohesive color to make rooms feel larger and more intentional;
- Focus on high-impact zones like the sofa, bed, entry, TV wall, and vertical corners to add style without clutter;
- Repositionable frames like Mixtiles make it easy to test layouts, refresh seasonally, and personalize your walls in minutes.
Decorating a small apartment does not have to mean compromising on style or your security deposit. With the right small apartment wall decor, you can visually expand your space, define zones, and tell your story without drills or damage. This guide shares renter-friendly decor tips, size guidance, and layout ideas that make a blank wall feel like home. You will see how to plan, install, and refresh with ease, and how Mixtiles turns your favorite photos into effortless wall art for small spaces.
Create custom, renter-friendly gallery walls with Mixtiles. Upload photos, pick frames, and get lightweight, adhesive tiles delivered to your door.
What makes small apartment wall decor different?
Small-space design is all about constraints and clarity. Limited square footage, multipurpose rooms, and rental rules require wall ideas that add character and function without adding bulk. The best approach uses lightweight, adhesive wall decor that installs cleanly, emphasizes vertical lines, balances color, and scales to your furniture so every room wall feels intentional.
How should you plan a layout without drilling holes?
You can plan a beautiful gallery wall without tools by choosing a focal area, mocking up the layout, and testing with movable, adhesive frames. This keeps your apartment wall flexible while you fine-tune spacing and alignment. For a deeper primer on damage-free methods, see our guide on how to hang wall art without nails.
Start with a focal wall and a purpose
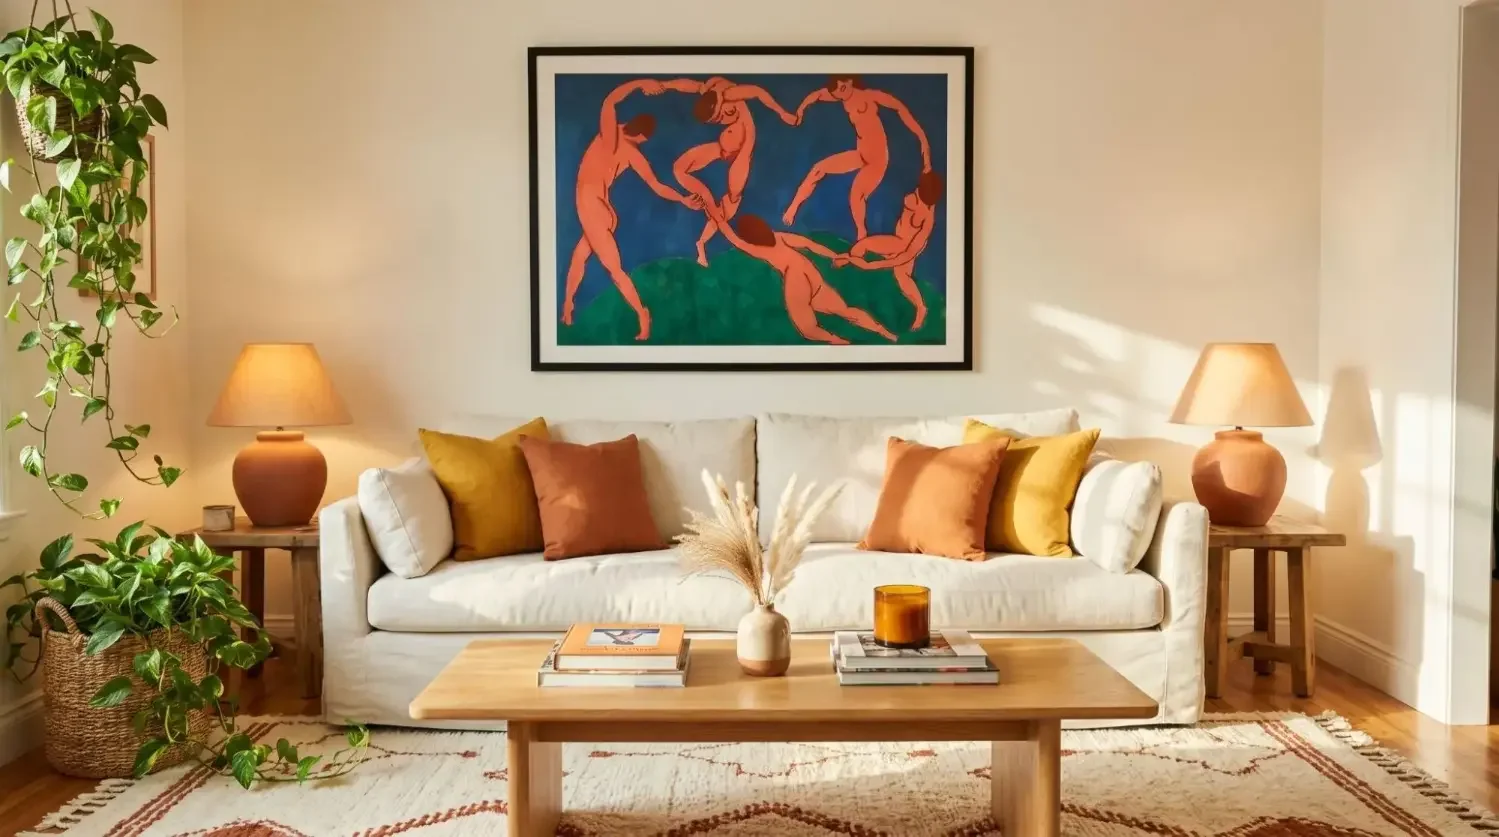
Pick your highest-visibility wall, like above the sofa, behind the desk, or in the entryway. Define the mood you want, such as calm, cozy, energizing, or gallery-like. The purpose guides your art choices, from black and white photos to bold abstract wall art.
Map it with tape or paper cutouts
Lay frames on the floor to find a rhythm, then outline sizes on the wall with painter’s tape or paper. This quick mockup helps you keep the living room wall balanced with your furniture and sightlines. Not sure where each piece should go? This tutorial on how to arrange art on a wall breaks down balanced layouts for beginners.
Test-drive with repositionable frames
Use adhesive, movable products like Mixtiles to explore a grid or salon-style gallery wall. Adjust height, straighten edges, and swap artwork until the design opens the room visually.
Leave breathing room
Consistent gaps help your wall art feel curated. Keep a clean margin above furniture, align outer edges where possible, and let negative space give each art piece a chance to shine.
Which small apartment wall decor ideas deliver the biggest impact?
Simple, repeatable layouts are your best friend. A tidy grid creates calm energy, while layered looks add personality. Choose one concept per wall to avoid visual clutter and to make the room feel larger.
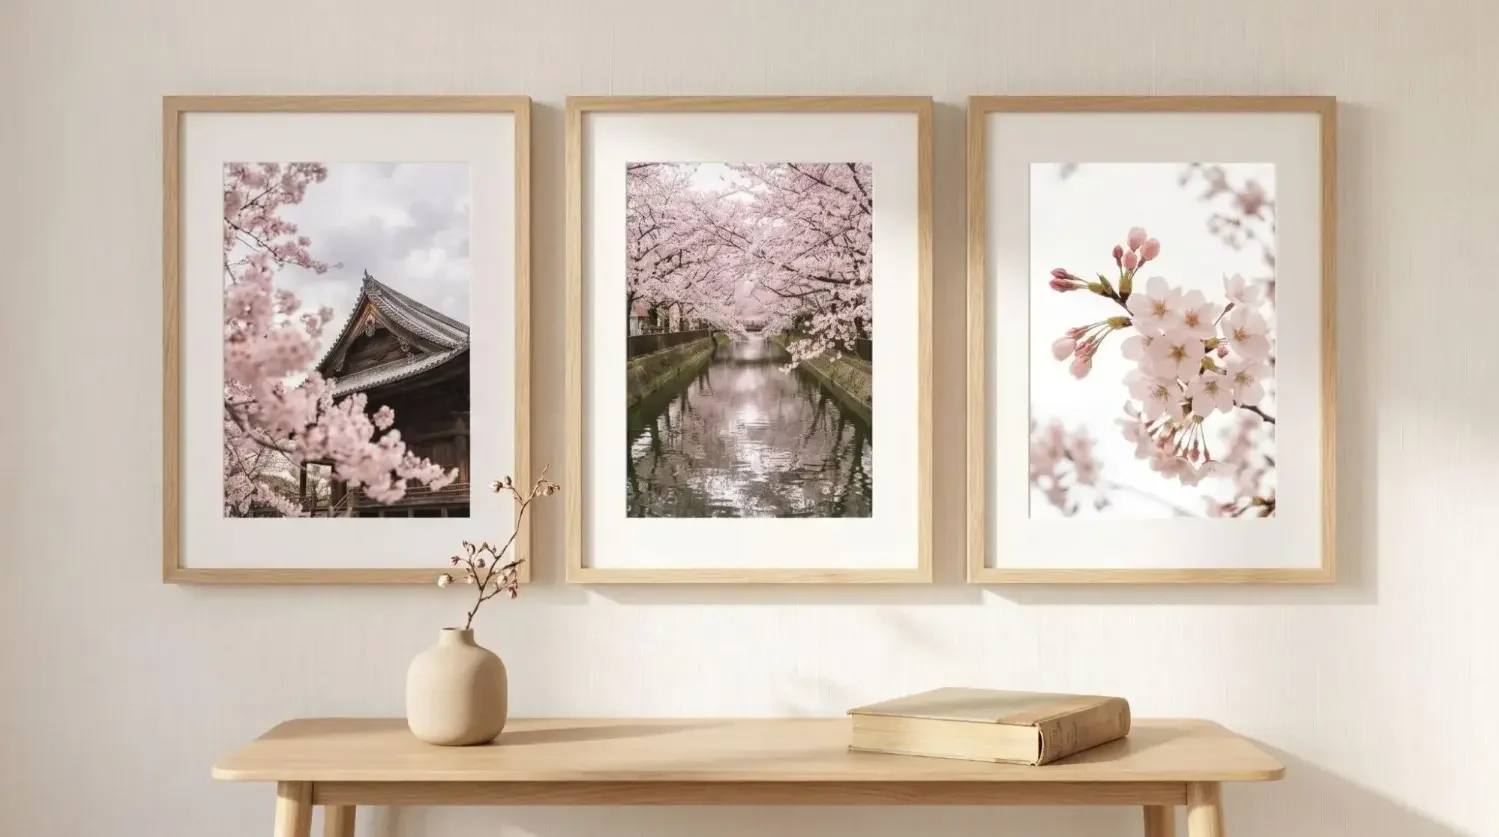
A tidy grid for calm energy
Uniform tiles in a 2 by 3 or 3 by 3 grid look polished over a sofa or bed. Grids reduce noise and make a small room feel ordered.
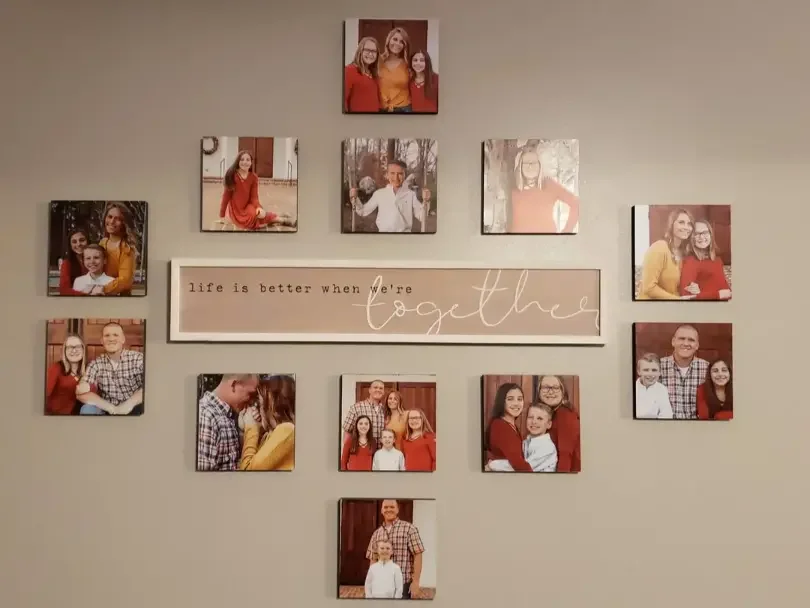
A cascading gallery wall
Mix sizes around a horizontal or vertical centerline. Keep frame colors consistent so your photos and artwork feel related.
Vertical stacks and corner wraps
Stack two or three frames to pull the eye up. Wrap a gallery around a corner to turn dead space into design.
Ledges and layered looks
Picture ledges allow quick swaps and seasonal updates. Layer a small plant or book with a photo tile for subtle texture.
Mirror and art pairings
Pair a mirror with two small prints to bounce light and brighten a dim room. It is a compact move with a big payoff.
Style around the TV
Balance the black rectangle by flanking it with columns of tiles or a centered grid. Blend abstract wall art with family photos for a curated media wall.
How do you choose the right sizes and spacing for small rooms?
Scale art to your furniture and keep spacing consistent. Use the table below to size galleries for common placements in a living room or bedroom. Measurements include both imperial and metric to help you plan precisely. For more specifics across room types, bookmark our wall art size guide.
|
Placement |
Recommended arrangement |
Total width or size guide |
Height above furniture |
Spacing between frames |
Visual center height |
|---|---|---|---|---|---|
|
Above sofa |
Grid or linear gallery |
60 to 75 percent of sofa width, for a 72 in sofa: 43 to 54 in (110 to 137 cm) |
6 to 10 in (15 to 25 cm) |
2 to 3 in (5 to 8 cm) |
57 to 60 in from floor (145 to 152 cm) |
|
Above bed |
2 by 2 or 3 by 2 grid |
Align with mattress width, leave equal margins on each side |
8 to 12 in (20 to 30 cm) |
2 to 3 in (5 to 8 cm) |
57 to 60 in from floor (145 to 152 cm) |
|
Narrow wall |
Vertical stack of tiles, like 12x12 canvas prints |
Tile width 8 to 12 in (20 to 30 cm) |
Center on wall height visually |
2 in (5 cm) |
57 to 60 in from floor (145 to 152 cm) |
|
Hallway |
Linear timeline gallery |
Run along the length of the hall at eye level |
Not applicable |
2 in (5 cm) |
57 to 60 in from floor (145 to 152 cm) |
If you are wondering about eye level across different heights and rooms, see our walkthrough on how high to hang art on a wall.
What styles and colors make a small space feel bigger?
Keep a cohesive palette and repeat finishes so the eye reads one calm story. Light backgrounds, slim frames, and white mats add air, while a consistent filter ties mixed photos and artwork together.
Cohesive color strategy
Pick one or two hues and a grounding neutral. Echo colors from pillows, rugs, or throws in your wall art for unity. A black and white set can also simplify a busy room.
Frame and mat choices
Thin black or white frames feel modern and light. White printed mats add breathing room that makes small apartment wall decor feel upscale.
Visual rhythm
Alternate light and dark images, repeat subjects or textures, and use symmetry for calm. Mix a single bold abstract wall piece into a mostly neutral gallery for focus.
Refresh in minutes with our repositionable photo tiles. Upload photos, choose a frame style, and move them anytime until your gallery looks perfect. No tools, no holes, no stress.
Where should you focus small apartment wall decor for maximum payoff?
Target high-impact zones. Concentrating decor near key furniture and transitions makes the whole home feel designed and open.
Living room

Anchor the living room wall above the sofa with a tidy grid that spans about two thirds of the sofa width. Add a mirror opposite a window to boost light.
Bedroom

Use a calming 2 by 2 or 3 by 2 grid above the headboard. Soft-toned imagery and consistent mats create a hotel-like feel.
Entryway

Create a vertical trio or a mirror with two prints to set the tone as you enter. Keep pieces high enough to avoid bumps.
Kitchen and dining nook

Install a petite ledge or a compact grid with recipes, travel food photos, or abstract wall art. Keep tiles away from direct splashes.
Bathroom

Choose bright, uplifting prints and place them away from steam. Mixtiles can be wiped with a dry cloth for easy care.
Hallway

Display a linear timeline gallery of trips and milestones. Consistent spacing keeps narrow corridors feeling open.
Can renters really decorate without damage (and keep their deposit)?
Yes. Opt for lightweight wall decor with clean-removal adhesive. Mixtiles are designed to stick and restick on flat painted walls, and many customers use them successfully on light texture, brick, stucco, wood paneling, and wallpaper. Clean the wall first, press firmly, and follow weight guidance for the best hold. When you move, lift tiles upward to remove them cleanly.
How do you tell a cohesive story with personal photos?
Pick a theme, edit for consistency, and arrange with a clear rhythm. This turns mixed images into one curated art collection.
Pick a theme
Try travel, cityscapes, weekends at home, or a color story. A black and white gallery wall can feel timeless and calm.
Edit for consistency
Apply one light filter across images and crop to matching ratios. Consistent framing makes the set feel like a single artwork.
Sequence with intention
Put the most striking art at eye level. Alternate close-ups with wide shots to keep the visual rhythm steady.
Add context
Mix in a Wall Sign with a favorite phrase or a map print. Small text elements help the display tell a fuller story.
What budget-friendly upgrades make your wall look designer?
These simple additions elevate your apartment wall without crowding the room.
- Add LED light strips behind a console or shelf to graze the wall art softly;
- Use picture ledges for easy seasonal swaps and quick room refreshes;
- Print a few texture shots like linen, terrazzo, or sky to tie palettes together and reduce visual noise;
- Refresh quarterly by rotating two or three tiles so the space feels new without a full redo.
How do you install Mixtiles in minutes?
Ordering and hanging are quick on the website or app. Follow these steps for a stress-free install.
- Prepare the wall: wipe dust off with a dry cloth and mark your visual center at about 57 to 60 inches from the floor;
- Plan the layout: arrange tiles on a table, confirm spacing, and preview a grid or gallery in the Mixtiles builder;
- Peel and place: stick your tiles, press gently for a few seconds, and align edges for a crisp look;
- Adjust and enjoy: reposition as needed, then clean tiles with a dry, soft cloth to keep them looking new.
Small apartment wall decor is less about square footage and more about smart choices. With the right scale, spacing, and color strategy, plus renter-friendly frames, you can make every room feel open and personal. Plan a focal wall, choose a layout that fits your furniture, and let your photos become the heart of your home. When it is time to refresh, simply peel, move, and restick for a brand-new look in minutes.
Ready to transform your small apartment walls without nails or stress? Turn your favorite photos to canvas with Mixtiles today. Start with our popular 8x8 canvas prints and enjoy a custom, renter-safe look that grows with you.
Frequently Asked Questions
How can I decorate apartment walls without losing my deposit?
Use removable adhesive strips, hooks, or poster putty for lightweight pieces. Clean the wall first, follow weight limits, and press firmly. Try fabric hangings on tension rods, washi-taped prints, or picture ledges mounted with removable hardware. Always test one item before committing.
What sizes and spacing work best for small walls?
Scale art to your furniture. Above a sofa, aim for 60 to 75 percent of its width. Keep 2 to 3 inches between frames, and hang the visual center around 57 to 60 inches from the floor. Grids or tidy vertical stacks reduce visual noise.
Do removable adhesives work on textured walls or in humid areas?
They hold best on smooth, fully cured paint. On lightly textured walls, test a single piece for 24 to 48 hours. In humid rooms, allow longer cure time, keep art away from steam and splashes, and use lighter items. Consider suction options on tile.
How can wall decor make a small room feel larger?
Use a cohesive color palette, light backgrounds, and slim frames. Add a mirror to bounce light, stack art vertically to draw the eye up, and leave negative space around pieces. Limit each wall to one clear focal layout to prevent clutter.
Be the first to know — deals, news & decor ideas.
By clicking you agree to the Terms of Use & Privacy Policy