
Wall Decor Ideas Without Nails: Our Renter-Friendly Tips
Key Takeaways
- The easiest wall decor ideas without nails include adhesive photo tiles like Mixtiles, removable strips and hooks, decals, leaning art, and easels;
- Success depends on surface prep, weight limits, and matching the method to your wall type like drywall, brick, tile, or textured surfaces;
- You can plan gallery walls that stay level and balanced by mapping layouts, keeping consistent spacing, and coordinating frames or colors;
- Mixtiles make it simple to hang art without nails, then restick and refresh layouts whenever you want, without damaging walls.
Looking for wall decor ideas without nails? Whether you rent or simply do not want holes in your walls, there are many stylish, damage free options. From adhesive photo tiles to removable wallpaper, leaning frames to ceiling hung plants, you can add personality to any room without drilling. This guide shares the best renter friendly ways to display artwork, how to prepare surfaces, and layout tips that make picture hanging easy, plus how Mixtiles turns your favorite pictures into beautiful wall art you can hang and rehang in minutes.
Create a no nail gallery in minutes. Upload photos in the Mixtiles app to create beautiful photo tiles, then stick and restick them anytime. No tools and no damage.
Why choose wall decor ideas without nails in the first place?
Going nail free lets you customize your home decor, then change it as life changes. It keeps walls looking new and avoids difficult patching later.
- Protect your deposit, paint, and plaster;
- Reposition and refresh your photo walls seasonally or when you get new photos;
- Reduce risk around kids and pets compared with heavy glass frames;
- Perfect for dorms, rentals, and temporary spaces that do not allow drilling.
What are the quickest wall decor ideas without nails you can try today?
The fastest options rely on adhesive picture hangers or freestanding displays. You can hang art without nails using Mixtiles photo tiles, strips and hooks like Command Strips, decals, washi tape, or just lean frames on shelves for instant style.
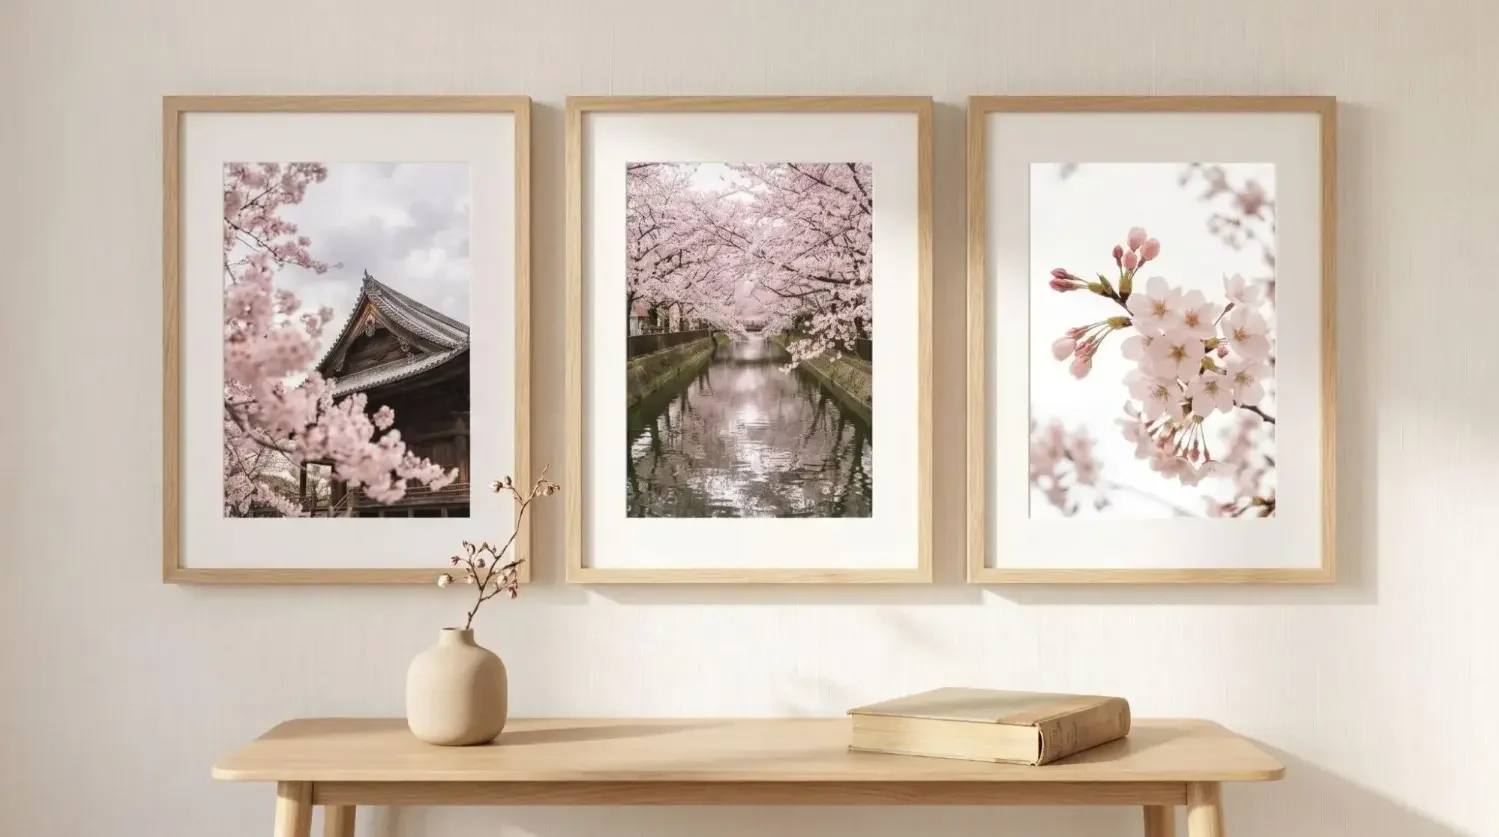
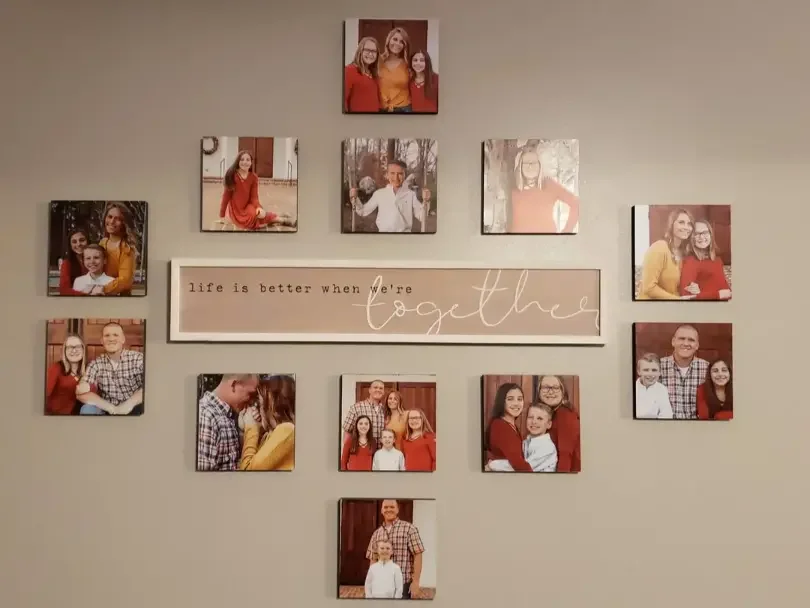
Stick-on photo tiles (Mixtiles)

Mixtiles are lightweight framed photos with adhesive backs or a magnet system, so you can hang wall art without drilling and without damaging walls. Upload pictures, choose frames or canvas tiles, then place tiles onto the wall at eye level. If you want to tweak the gallery wall, lift and restick. It is an easy way to hang pictures without nails in grids, rows, and organic clusters.
Removable hooks and adhesive strips
Adhesive hooks and strips are great for picture hanging when you want tools free setup. Use adhesive strips for small frames and posters, or adhesive hooks for lightweight shelves and decor items. Always check the product weight rating and follow curing times so your artwork stays put.
Vinyl wall decals and removable wallpaper

Decals and removable wallpaper add color, texture, or murals without paint. They are ideal behind a gallery wall or as a bold accent in a living room or nursery. When you are ready for a new look, peel them away without leaving holes.
Washi tape frames and poster putty

For prints and small pictures without nails, washi tape and poster putty are fun, budget friendly options. Create playful tape borders around photos or mount a light poster with putty. Reserve these for very light pieces and smooth walls.
|
Method |
Best For |
Typical Weight Guidance |
Ideal Rooms |
Tools Needed |
|---|---|---|---|---|
|
Mixtiles Photo Tiles |
Gallery walls, family photos, travel art |
Lightweight tiles, designed for long-term hold |
Living room, hallway, bedroom |
None, peel and stick or magnets |
|
Adhesive Strips |
Small frames, posters, canvases |
Check per brand, many support several pounds |
Bedrooms, offices, rentals |
Level optional |
|
Adhesive Hooks |
Hats, light shelves, hanging planters |
Varies widely, verify before hanging |
Entry, laundry, kids’ rooms |
None |
|
Decals or Wallpaper |
Murals, accent walls, kids’ themes |
N, A |
Nursery, playroom, living room |
Squeegee optional |
|
Leaning Frames and Easels |
Large artwork, statement pieces |
No wall load, safe for heavy frames |
Living room, bedroom, studio |
Furniture surface or floor stand |
How do adhesive photo tiles like Mixtiles compare to other no-nail options?
Mixtiles combine quality prints, consistent frames, and a gentle adhesive into one product. You do not need extra strips or hooks. You just place the tiles onto the wall and adjust until your gallery looks perfect.
Speed and simplicity
From upload to delivery, Mixtiles removes guesswork. You select styles, borders, and sizes, then stick your wall art in minutes. No wire, no level, and no picture hanger needed for most layouts.
Flexibility and finish
Because tiles are repositionable, you can refresh your gallery walls seasonally or for special events. Matching frames create a clean, designer finish across your space.
Wall safety
Tiles are designed to hold tight and remove cleanly when lifted properly. Many customers use them on painted drywall, wood paneling, and even brick or stucco when pressed firmly.
Cost and scalability
Pricing is predictable per tile, so you can start small and expand. You can also choose Gallery Wall Kits for curated layouts, custom canvas prints for a premium look, and Wall Signs to add a favorite quote.
Can you build a gallery wall without nails that actually stays put?
Yes. Plan your arrangement, clean the surface, and place tiles with consistent spacing. Good prep plus light, even pressure helps everything stay straight and secure over time.
Plan the layout before you stick
Pick a theme like travel, family, or black and white. Arrange your pictures on the floor first, or outline a grid with painter’s tape. Mixtiles Gallery Wall Kits include templates and layouts that make planning easy.
Spacing, height, and alignment tips
Center your display around 57 to 60 inches from the floor for eye level. Keep consistent gaps between frames for a tidy look, often about 1.5 to 2 inches. Grids feel modern and calm, while organic clusters create a playful, artful vibe. If you want more detail on how high to hang art on a wall, use this quick guide.
Mix sizes without chaos
Anchor the arrangement with a middle row or a larger center tile, like a 12x12 canvas print, then expand outward. Balance visual weight across left and right so the wall looks even from a distance.
Test and tweak
Start with a few tiles, step back, then adjust. Add more tiles once the base looks right. Since you can restick, you will always feel free to refine the design.
Ready for a nail free photo gallery wall? Choose your photos in the Mixtiles app and get damage free frames delivered to your door.
Which nail-free ideas work best for different wall types?
Match the method to your surface. Smooth painted walls love adhesive tiles and strips. Textured or hard materials may need extra pressure, a test patch, or freestanding solutions.
Painted drywall and plaster
Adhesive tiles, strips, and decals perform well on clean, dry paint. Let fresh paint cure for at least 30 days. Wipe the wall with isopropyl alcohol, then let it dry before you hang wall art.
Textured walls and orange peel
Adhesion can vary. Test a single tile or strip first. Press all edges firmly. If sticking is inconsistent, lean frames on shelves or use an easel for a great look without risk.
Brick, concrete, and tile
Some adhesives work on non porous surfaces, especially when you press hard for a few seconds. If you want to hang heavy pieces, consider leaning art or a freestanding display instead of adhesive hooks. For brick specifically, see how to hang art on a brick wall for secure results without stress.
Wallpapered surfaces
Delicate papers may lift when removing adhesives. Test in a hidden corner. If you see any movement, switch to leaning frames or picture ledges that do not rely on sticky products.
What are creative, drill-free alternatives beyond adhesives?
You can make a strong statement without adhesive strips or hooks. Freestanding and leaning methods are stylish, safe, and easy to move.
Leaning and layering
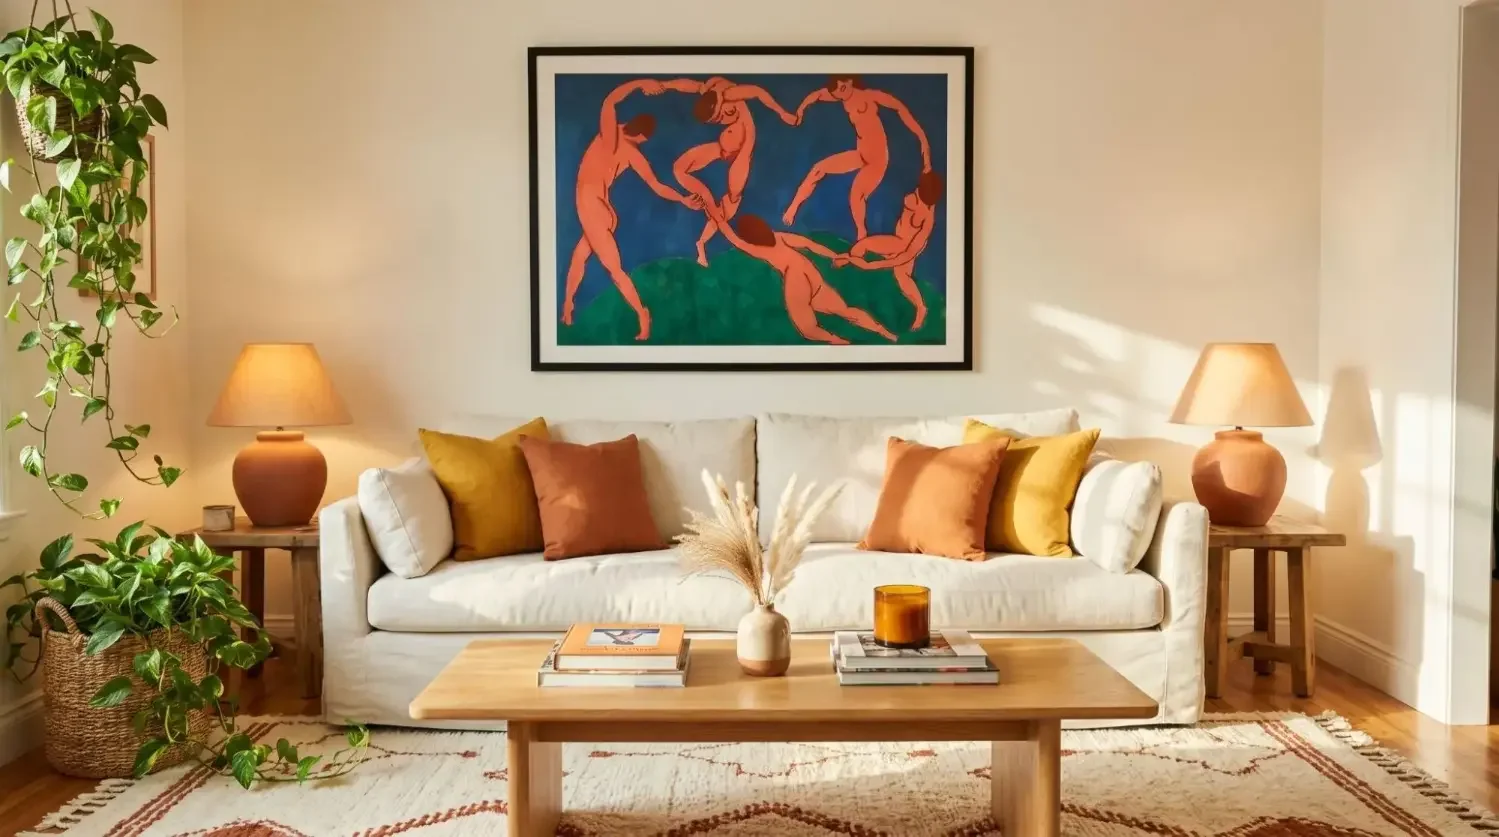
Rest frames on consoles, mantels, dressers, and bookshelves. Layer pieces of different sizes to add depth, then anchor the look with one larger artwork.
Freestanding ladders and picture ledges
No drill ladders and floor standing ledges create a flexible display. They hold frames, plants, and small decor items that you can swap out anytime.
Easels and tabletop stands
Use a floor easel for a statement canvas or a tabletop stand for small prints. These are smart ways to display art without nails in small apartments.
Ceiling-based solutions
Where allowed, tension rods and ceiling hooks can support textiles or plants. Keep weight light and verify limits for each hook or system.
Freestanding display screens
Movable screens act like instant gallery walls. Clip photos and artwork, then roll the screen to a new room when you want a fresh view.
How do you prep and install for nail-free success?
Clean, match, and cure. A little setup time prevents slipping and keeps frames straight so your hanging pictures look professionally installed.
Surface prep checklist
Before you start, run through this quick checklist for better adhesion and a longer lasting hold.
- Wipe the wall with isopropyl alcohol and let it dry fully;
- Avoid freshly painted walls and wait at least 30 days before applying adhesives;
- Ensure the room is at a normal temperature so adhesive can bond well;
- Plan spacing on the floor, then stick tiles gently and press along the edges to finish.
Weight and product matching
Check weight ratings for adhesive strips and hooks before you hang wall art. Mixtiles are designed to be light, so they will not need heavy hardware. For larger frames you already own, choose adhesive picture hangers or command hooks that meet or exceed your frame’s weight.
Cure and remove properly
After you place adhesives, follow the recommended wait time before loading weight. When you are ready to move items, lift tiles upward to release. If you used wall magnets, peel the pad up slowly and parallel to the wall to avoid paint damage.
Can you decorate kids’ rooms and rentals without risking damage?
Yes. Pick products that are gentle on paint and easy to update. Avoid permanent mounting so you can reset the room as needs change.
Family-friendly ideas
Use Mixtiles to showcase school art, baby milestones, or vacation highlights. Add removable decals for themes that evolve as they grow. Washi tape frames make quick borders for prints that you can swap out every season.
Rental do’s and don’ts
Review your lease to confirm whether adhesive hooks and strips are permitted. Test a small area before full installation. Keep photos of the wall condition when you move in and when you move out so you have a record that you did not leave holes or damage.
What if your decor is heavy or oddly shaped?
When pieces are heavy or irregular, choose safer ways to display. You can still get a gallery look without nails by leaning or using specialty systems.
Strategies for heavier items
Lean large mirrors or oversized canvases on mantels and consoles. If you want to hang, pick heavy duty adhesive hooks or strips with the correct rating and test carefully. In older homes with picture rails, use rail hooks and cords to hang art without drilling into the wall. If you proceed, follow this step by step on how to hang heavy art on a wall to protect both the piece and your surface.
Plates, textiles, and irregular shapes
Lightweight plate hangers with adhesive backs can hold small ceramics. For textiles, hang them from a tension rod or clip system so weight distributes evenly. Sculptures sit best on shelves or pedestals where you can see them from multiple angles.
How can you refresh your wall decor with the seasons, no nails needed?
Build a modular setup that welcomes change. Keep a core gallery, then rotate a few tiles or add accents that reflect the season or a new color story.
Modular, mix-and-match galleries
Swap a few Mixtiles to feature fresh photos from a trip or holiday. Add a Wall Sign to introduce a quote. If you want a richer texture, bring in Canvas Tiles for a focal point without changing the whole wall.
Room-by-room quick swaps
Here are simple ideas that help each space feel new without drilling or damaging walls.
- Entry: rotate welcome quotes, travel snapshots, or a seasonal Wall Sign;
- Living room: refresh family highlights and add a temporary garland around the gallery;
- Nursery or office: update inspiration boards, school art, or milestone photos;
- Hallway: build a timeline gallery and add new pictures without nails as your story grows.
You do not need nails to design walls you love. With smart planning, surface prep, and the right methods, you can hang wall art without drilling or damaging paint. From adhesive photo tiles and strips to leaning art and freestanding displays, there are many ways to display pictures without nails in any room. For the fastest, cleanest approach, Mixtiles helps you create a cohesive gallery wall in minutes, then restick and refresh it whenever you want.
Make your nail free gallery wall today. Download the Mixtiles app to turn your favorite pictures into stunning canvas prints and enjoy damage free decor in days.
Frequently Asked Questions
Which nail-free methods work best for different wall surfaces?
On painted drywall or cured plaster, adhesive tiles, strips, and decals perform well after cleaning with isopropyl alcohol. On textured walls, adhesion varies, test first and press edges firmly. Brick, concrete, and tile favor high-bond adhesives on smooth areas, or skip adhesive and lean artwork or use freestanding displays.
How much weight can adhesive hooks or strips hold, and how do I keep items from falling?
Check the product's weight rating and use enough strips for the surface area. Ensure surfaces are clean and dry, press firmly for 30 seconds, and respect curing time before loading. Use flat-backed frames, avoid overhangs, and consider multiple anchors for wide pieces.
Will nail-free adhesives damage paint, and how should I remove them?
Risk is low if you follow directions. Avoid applying on fresh paint, wait 30 days. To remove, pull tabs slowly and parallel to the wall, or warm adhesive slightly to soften. For wallpaper and delicate finishes, test in a hidden spot and choose lower-tack products.
Can I use nail-free decor in bathrooms or kitchens with humidity?
Yes, choose water resistant adhesives rated for bathrooms, clean with alcohol, and allow full cure time before exposure to steam. Place items outside splash or heat zones, ventilate well, and check periodically. When conditions are extreme, consider suction-based hardware on tile or freestanding decor.
Be the first to know — deals, news & decor ideas.
By clicking you agree to the Terms of Use & Privacy Policy